
When it comes to doing arts and crafts with my 4yo daughter, I aim for projects to be KISS-able: Keep It Simple, Sweetheart! With that in mind, I organized materials we had already and together we whipped up a handful of shamrock projects that were fun, fast, and can even be a little educational, too.
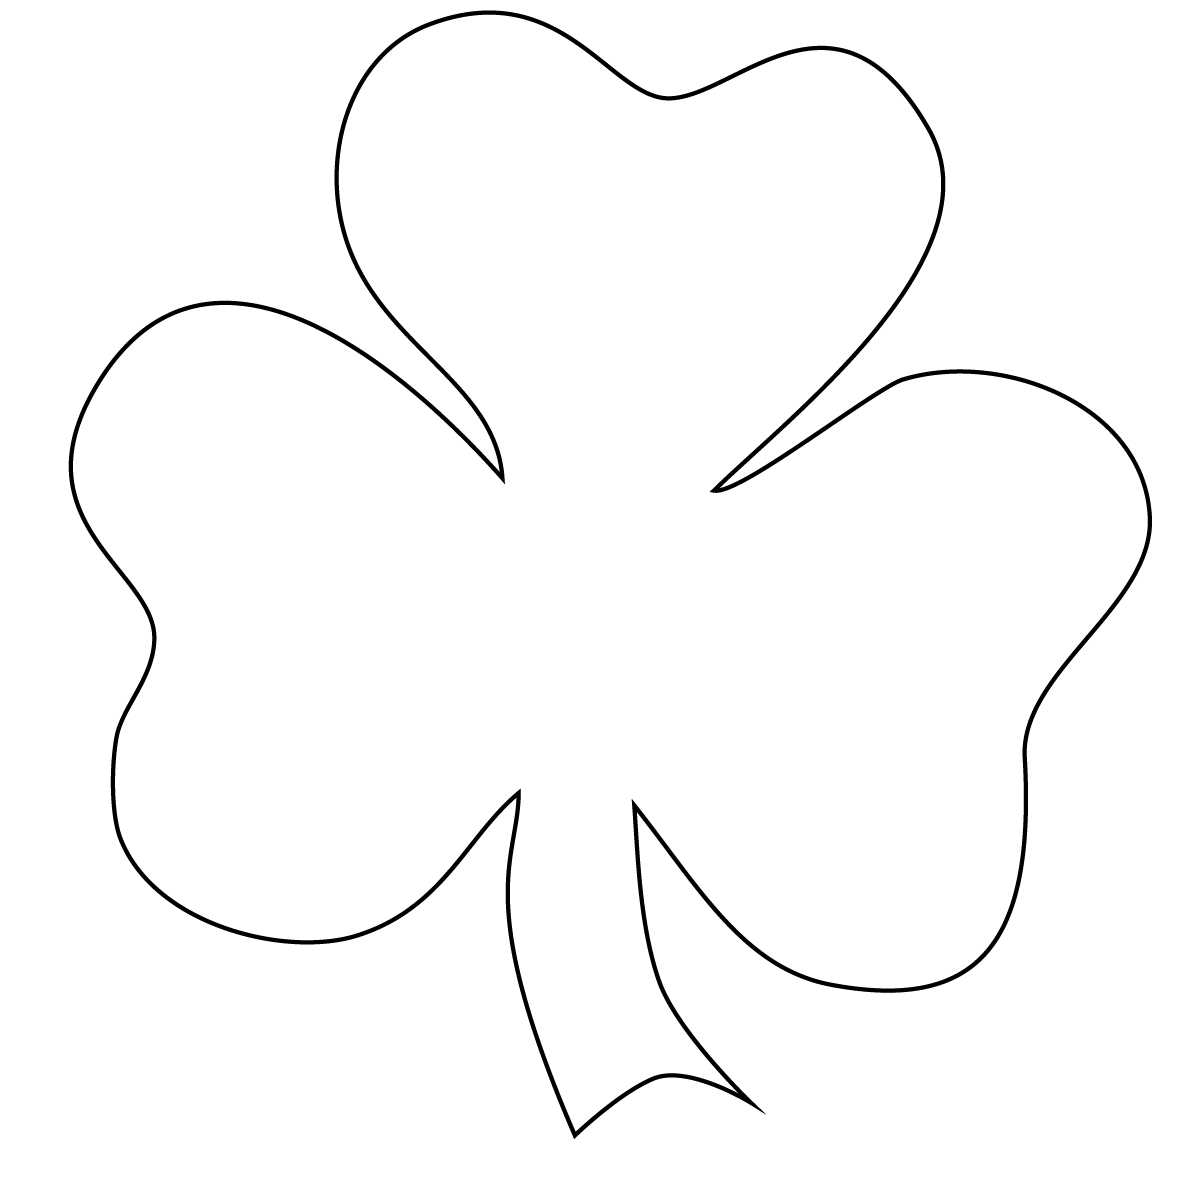
Although you’ll often see four leaf clovers used in their place, my Irish husband insists that REAL shamrocks have 3 leaves. He also points out that like snowflakes, no two shamrocks are alike. The shape of a shamrock is essentially 3 hearts and a stem, so I went freestyle in drawing up a large template. I also made some smaller stencils on card stock by tracing a heart cookie cutter into the perfect shamrock. If needed, you can find a printable shamrock that tickles your fancy.
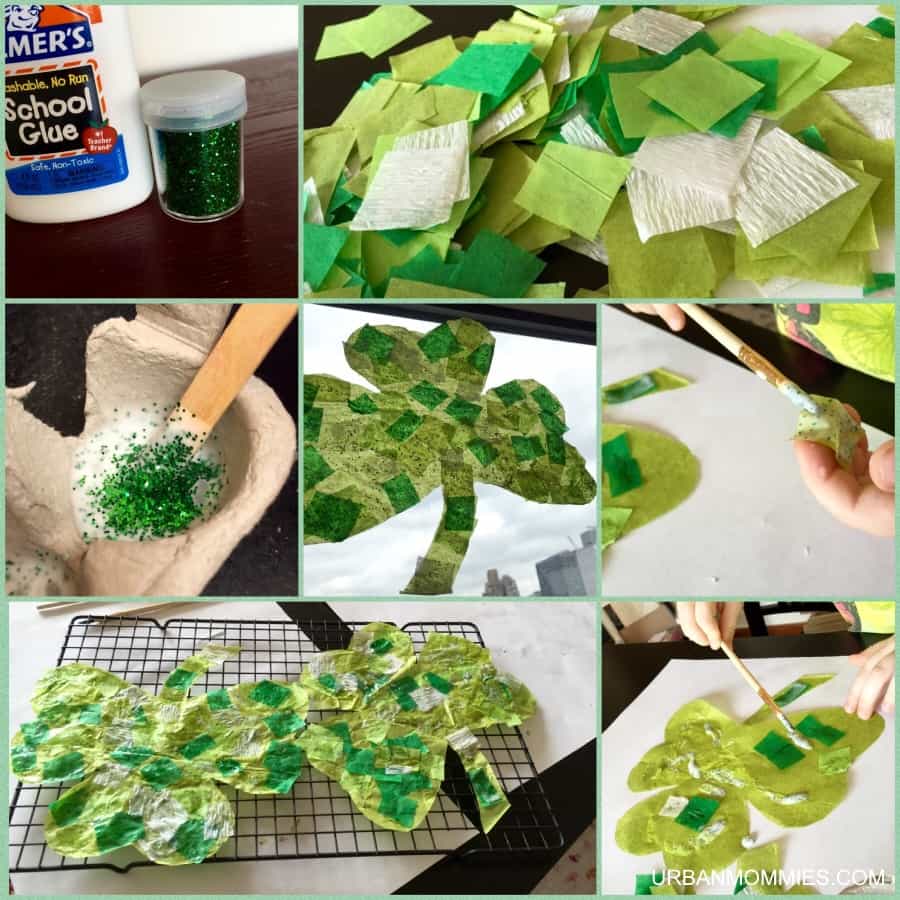
Stained Glass Shamrock Collage
You need: Tissue paper in a few colors, paintbrush, white glue, and green glitter (if you dare!). Optional: sheet of paper to mount shamrock onto.
Prep: Cut a large shamrock out of pale green or white tissue paper. Cut or tear small squares of different colored tissue. Mix glitter into the glue.
Using a paintbrush, fingers, or popsicle stick, apply glittered glue to the large shamrock. Layer the small squares on top as desired. Painting another layer of glue will help keep the tissue in place and add extra sparkle.
The beauty of this project is using glittered glue adds lots of texture. Even if your children just go to town painting the shamrock with glittered glue and only add a few squares, the effect really is pretty.

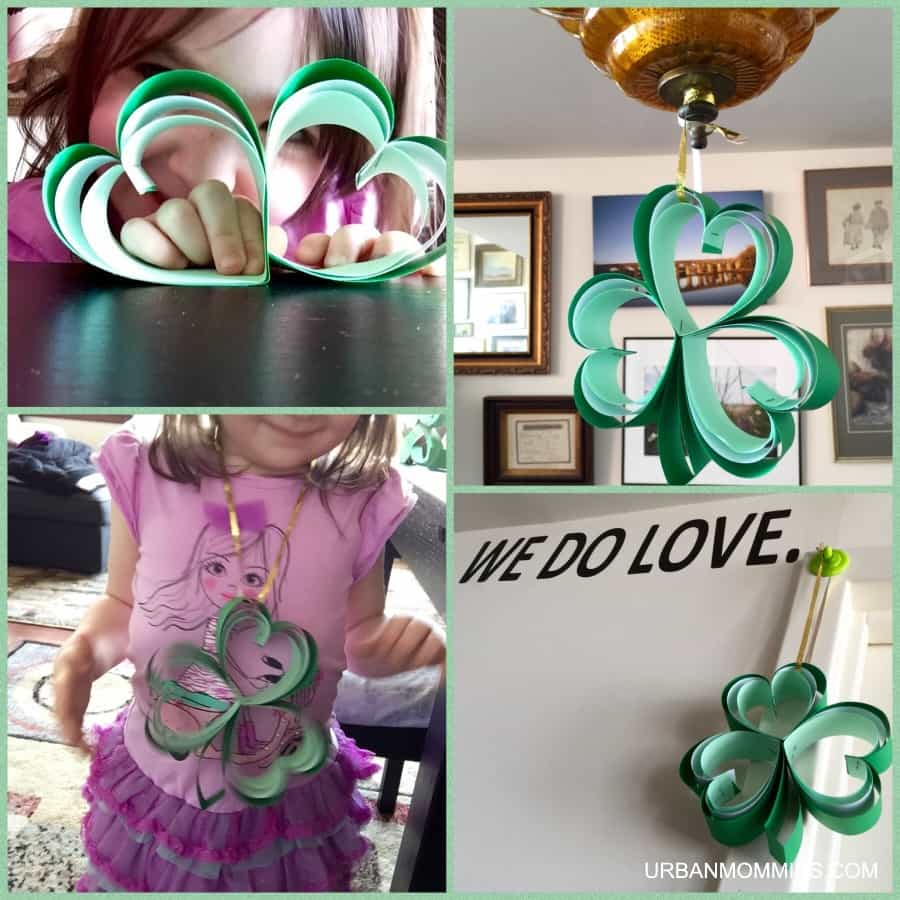
TriColored Paper Shamrock
You need: stapler, 4 sheets of paper 2 of one color (dark green), 1 each of two additional colors (light green, 1 white), and some ribbon for hanging (we picked gold sparkle)
Prep: Cut 1 of each colored sheet into strips, lengthwise. The longest strips should be of the color you have 2 sheets of. Then, cut down 2 colors to medium (1″ off) and smallest (2″ off) lengths. The 2nd sheet of the outside color (dark green) will be used to make the stems – cut this into short strips, widthwise.
Step 1: Ask your child to arrange 1 of each colored strip in order, largest to smallest.
Step 2: Fold each strip in half.
Step 3: With the smallest on the inside, largest on the outside, line all 3 strips together at one end. Then alight all the ends together at the other end. You’ll see how the strips start to pop apart.
Step 4: Turn the ends of one side in toward the middle, then turn over the other ends, folding the strips to form the point of a heart. Staple together.
Step 5: Repeat 1-4 to form 2 more hearts.
Step 6: Fold one strip for the stem in half.
Step 7: Arrange the 3 hearts into a shamrock shape, and insert the stem. Staple each heart to the next, including all 3 layers. To make the stem a bit fatter at the bottom, just adjust it to your liking before stapling it between 2 of the hearts.
Step 8: Use thread or ribbon to hang!
These are probably my favorite. Not only is there minimal mess involved, they look great hanging on their own, or together in a row, like streamers.
Related
A St. Patrick’s Day Travel Experience
Wine Cork & Cookie Cutter Stamps
Using washable kids paint, my daughter and I tried different objects as stamps. A shamrock formed from 3 wine corks rubber banded together was certainly the best for keeping our hands clean. However, we preferred the cookie cutter heart for making the best shamrocks. With both, we used a small paintbrush to draw the stems, and color in the shamrocks.
In addition to the stamping, we also played with our paintbrushes. My daughter discovered that she could make a circle by pressing the brush down and swirling the it in a circle. She thought this method was by far the most fun, and really liked the effect of how the brush strokes fanned out.
Mixed Media Masterpiece
Working on all these different projects inspired me to do a craft that brought all these materials together into one picture. Using the scraps from our paper shamrocks, along with the extra tissue paper pieces, we got to work with our glittered glue and each of us created a collage in the shape of a hillside on a large sheet of paper. We then painted a blue sky on top. We allowed these to dry completely, and then used different methods to stamp and paint shamrocks on our hillsides. The resulting landscapes definitely celebrate the lush colors found in the Emerald Isle!

[…] Celebrate St. Paddy’s Day with Last Minute Shamrock Crafts […]
[…] This Green Pistachio Cake Will Have Irish Eyes Smiling Celebrate St. Paddy’s Day with Last Minute Shamrock Crafts […]