With endless colour combinations and many different ways to decorate, making colourful eggs can be as easy or as intricate as you choose, making it a perfect activity for all ages and skill levels. From a simple egg dyed one colour, to ornate and delicate patterns, Easter eggs are as unique as the people that create them. Here are a few Easter egg decorating tips for you to explore – but I’m sure your kids have TONS of ideas of their own!
How to Hollow Your Easter Egg
- Wash and dry an egg.
- Using a large needle, pierce both ends of the shell. Make sure you pierce the needle deep enough to break the egg yolk.
- Wiggle the needle around in a circular motion to open the hole at one end of the egg.
- Holding the egg over a bowl, blow into the large opening at one end of the egg to force the egg white and yolk out of the egg. Gently rinse off the shell with cold water; allow it to dry completely.
How to Dye Your Easter Egg
- If using store-bought dye, prepare according to package directions; if using natural dye (we have some great ideas in the link), mix 1 teaspoon vinegar with 1/4 teaspoon of food colouring or the ideas in the link. Pour the dye into 3/4 of a cup of water, in a cup or glass deep enough to cover the entire egg.
- Using tongs or a spoon, place the egg in the dye. Do not drop the egg in, or the shell might hit the bottom of the cup and crack. You can also thread a thin wire through the holes in each end of the hollowed egg shell, bending the wire at one end so the egg won’t slip off.
- Completely submerge the egg in the dye until they are the desired colour, from two to five minutes. Remember, the longer you leave the egg in the dye, the deeper the colour will get.
- Remove eggs from the dye and allow to dry before adding another colour or continuing to decorate.
- Tip – Place eggs on a cake rack to allow them to dry quickly and evenly.
Tips to Customize Your Easter Egg
Easter eggs can be customized in many ways. Use common craft items such as markers, glitter, and crayons to customize you eggs similar to the following pictures. Here are some of our favourite ways to make eggs extra special:
- Sprinkle sparkles over a freshly-dyed egg for a glittery finish.
- Before putting the egg in the dye, draw a pattern on the shell with a white crayon. The wax in the crayon will prevent the dye from sticking to the egg, leaving a white pattern.
- Apply small stickers to, or wrap rubber bands around the egg before dying; remove once the egg is dry, leaving an interesting pattern.
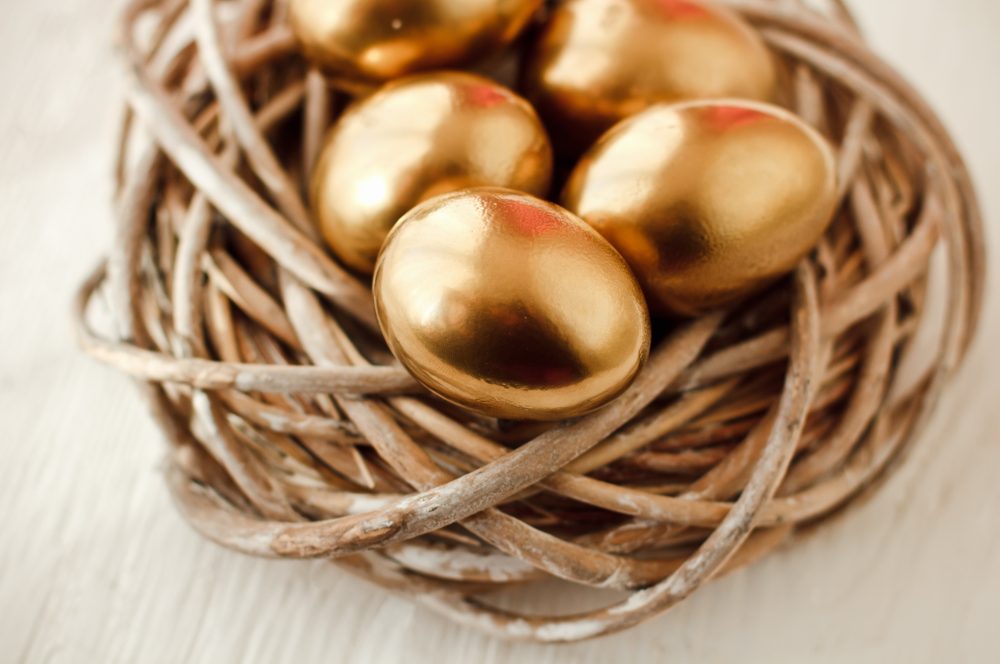
- Apply gold leaf to the outside of the egg. Careful! A cheaper alternative is to glue bits of tinfoil all over.
- Mix one tablespoon of vegetable oil into the dye to create a marble effect on your Easter eggs.
- Once dry, paint the egg using acrylic paints and small makeup or craft sponges. You can also sponge paint small designs on the eggs using a stencil.
- Glue small beads, embroidery thread or lace onto the Easter egg for added effects.
- Apply googly eyes and other accessories to Easter eggs to create cute animals or faces.
- Rub Easter eggs with a little vegetable oil for extra sheen.